AutoTrade v2.0.0 ships deep n8n integration and a hardened local-HTTP workflow so you can orchestrate execution from visual automations with zero broker lock-in.
- Native n8n workflows: Trigger AutoTrade from n8n using n8n-nodes-autotrade. Build end-to-end flows (alerts → risk checks → AutoTrade) without custom plugins.
- Token-based auth for local HTTP: Secure your local agent with reusable tokens. Send Authorization: Bearer
headers from n8n (or any client) to authorize execution calls. Rotate or revoke tokens anytime. - Simple endpoints: New local routes for /execute (single action), /sequence (multi-step click flows), and /schedule (create one-off or recurring jobs). Designed for low-latency desktop execution.
- Broker-agnostic click automation: Your strategy stays the same while AutoTrade performs precise UI clicks on whatever platform is on your desktop. No broker APIs required; switch providers without changing code.
Step by step
Goal: Trigger AutoTrade actions from n8n (e.g., execute/cancel orders, toggle strategies) using authenticated HTTP calls.
Prerequisites
- AutoTrade running
- Local n8n instance up
Quick Overview
- Install n8n-nodes-autotrade (Community Nodes).
- Generate token in AutoTrade → Settings → HTTP Connection.
- Create workflow with your trigger.
- Add AutoTrade node → set credentials, URL, robot, action, and field mappings.
- Test, then Activate in production.
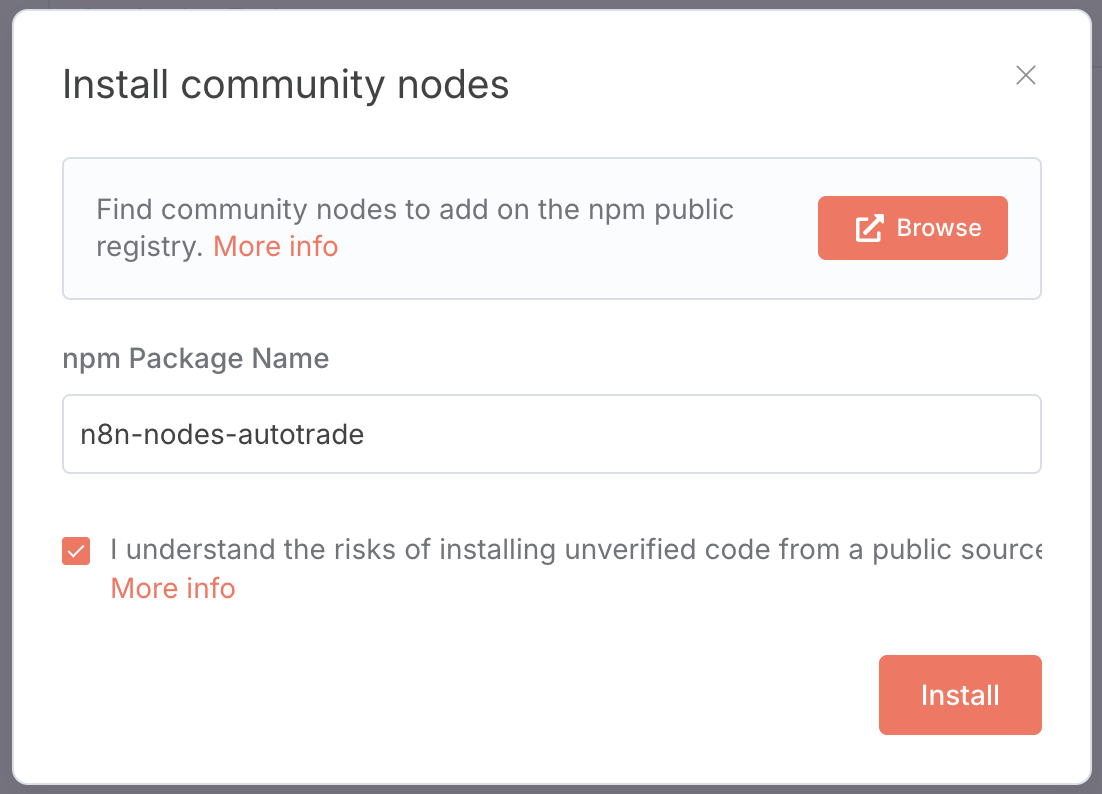
Install the connector
In n8n:
- Go to Settings → Community Nodes.
- Click Install and search for n8n-nodes-autotrade package.
- Confirm installation.
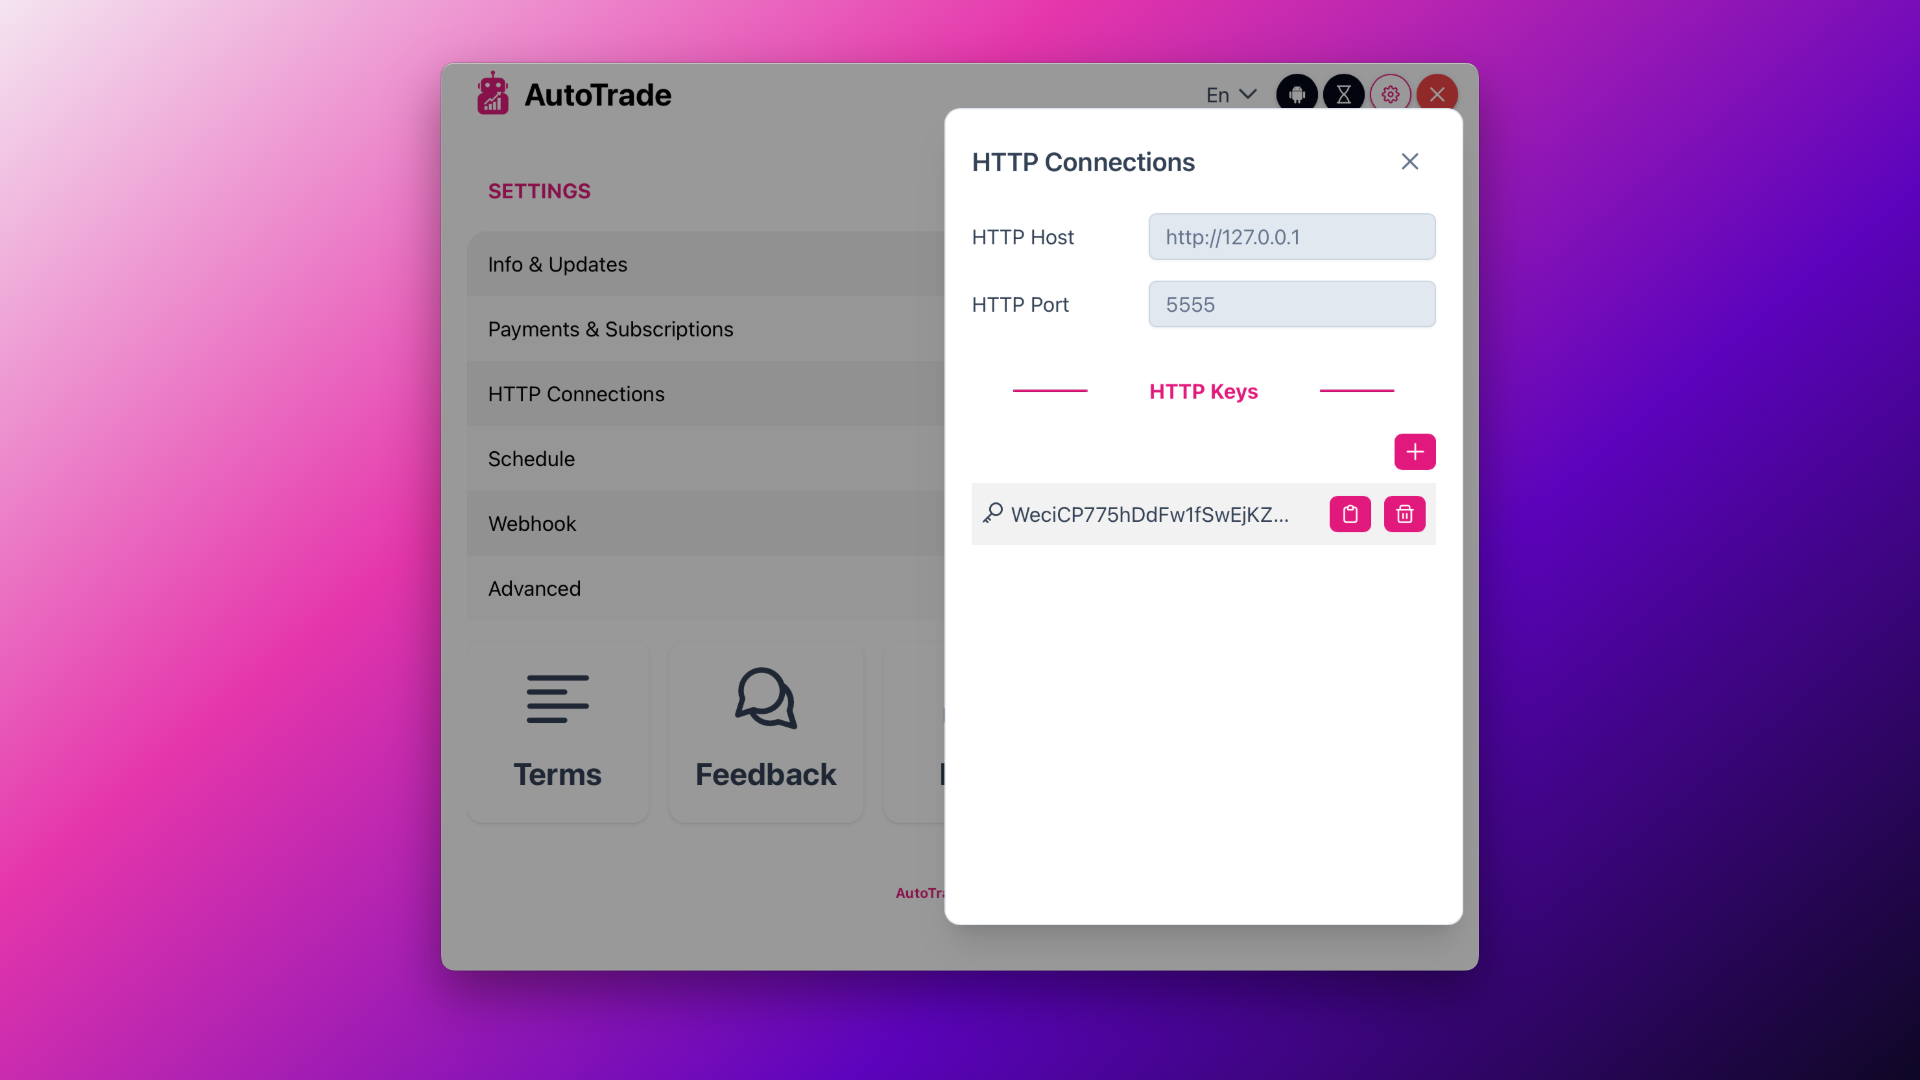
Generate AutoTrade credentials (Token)
In AutoTrade Pro:
- Log in.
- Go to Settings → HTTP Connection.
- Click “+” to generate a new API token, then copy it.
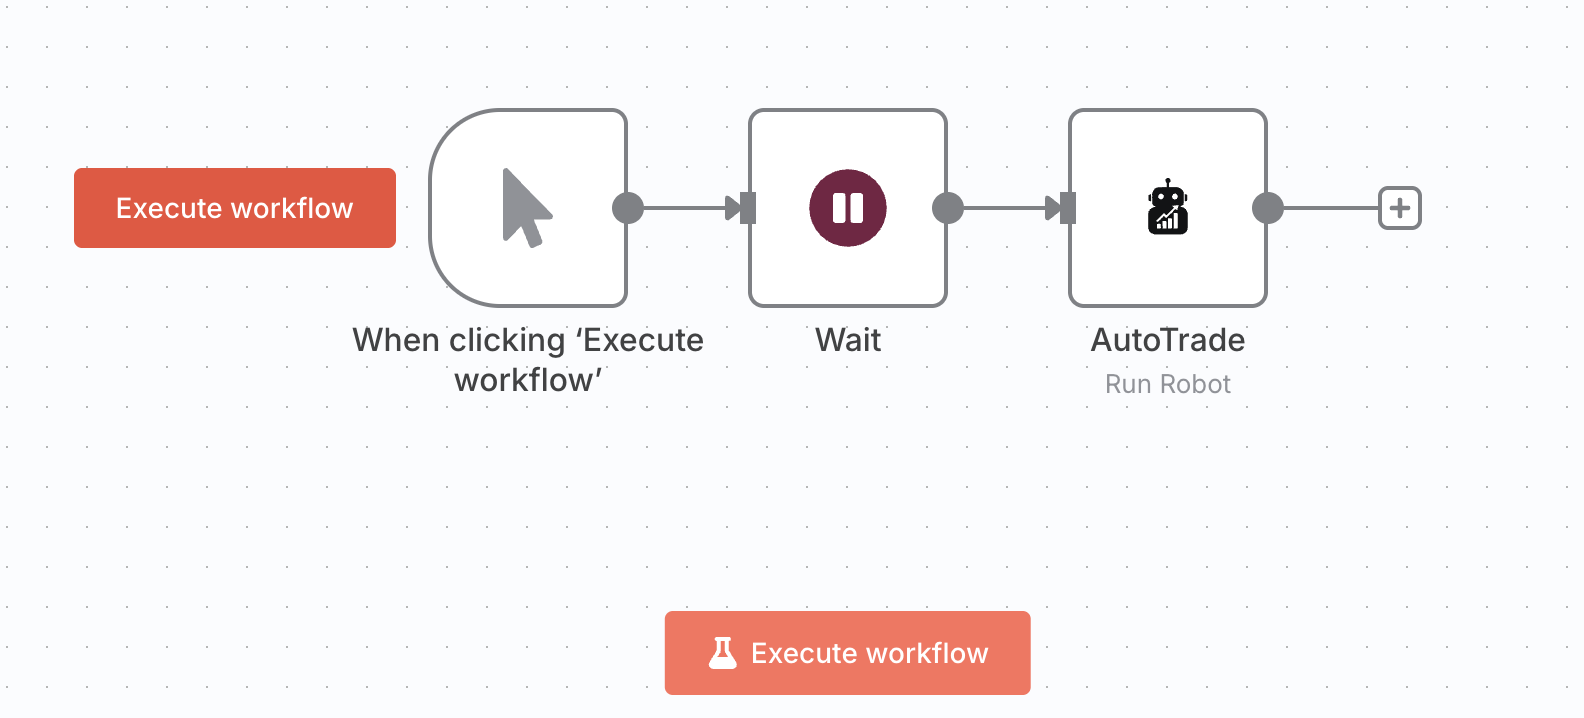
Create a New Workflow in n8n
- Click New Workflow.
- Add a trigger.
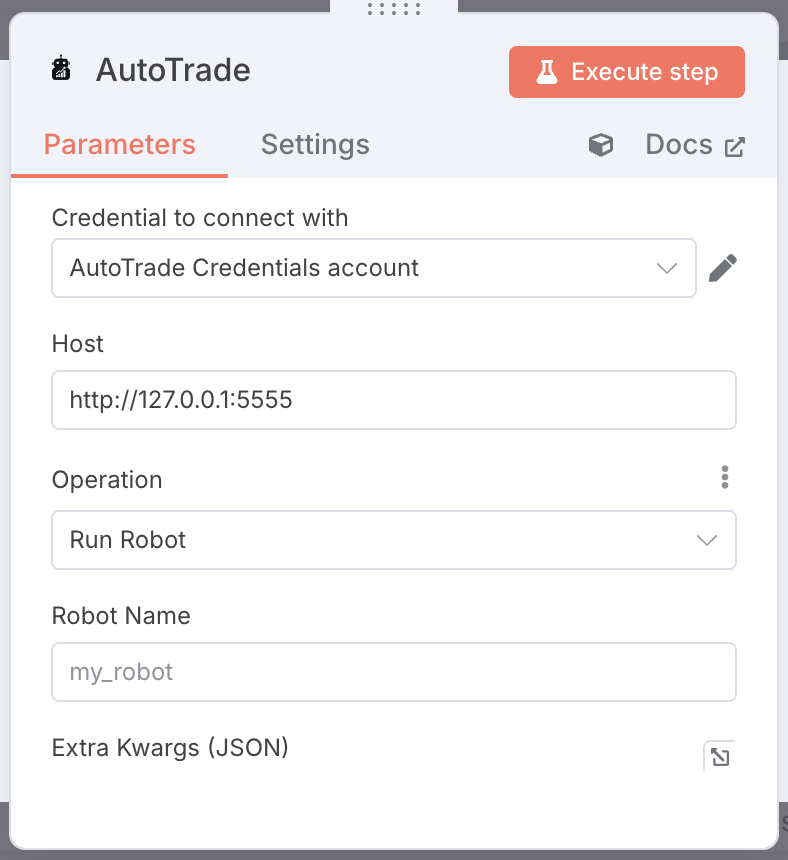
Add & Configure the AutoTrade Node
- Add the AutoTrade node.
- Credentials: create/select credentials and paste your token.
- Base URL: use your AutoTrade URL (e.g., http://127.0.0.1:5555).
- Robot name: type your robot’s name (must exist in AutoTrade).
Test the Flow
- Click Execute Workflow (top right) to run in test mode.
- Inspect the AutoTrade node output for success/response.
Networking Tips
- Local AutoTrade: use http://127.0.0.1:5555 from the same machine; if n8n runs in Docker, use the container name/network alias instead of localhost.
- Remote AutoTrade: expose via a reverse proxy (Caddy/Nginx), enable TLS, and restrict by IP/rate-limit.
- Firewalls: open the AutoTrade port only to n8n if possible.